Pages

Friday 30 May 2014

Was this a holiday or a history lesson?


Well, actually it was both! I have always loved history and archaeology and never let it be said that I am one to miss the opportunity to impart wonderful historical knowledge to my children, even if they're not in the slightest bit interested (which fortunately for me and the sake of our holiday on this occasion they were). My eldest has been doing Iron Age and Roman Britain as her topic this term so when we found ourselves near Castell Henllys it was the perfect place to visit to show her what iron age life was really all about.


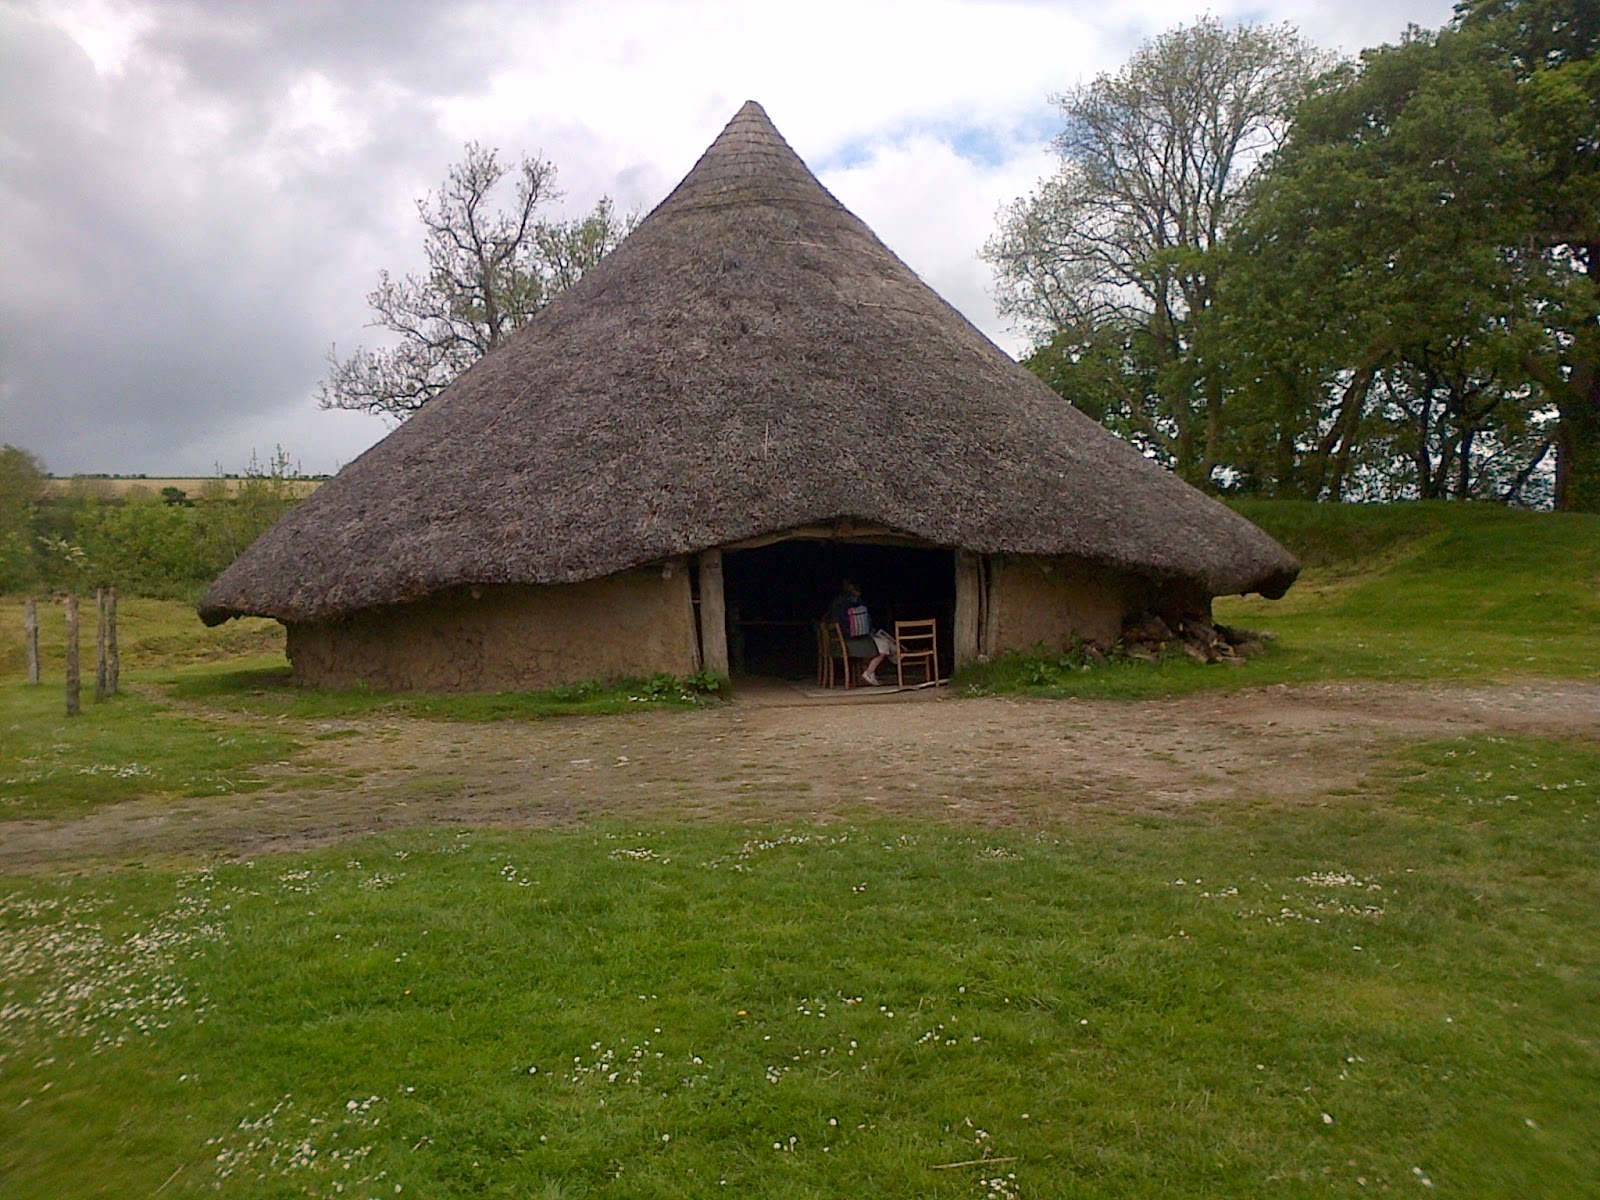
If you get the chance to visit then I thoroughly recommend it for a day out with the family - reasonable entrance price and plenty to see and do. Castell Henllys is an iron age hill fort which has been partially reconstructed for visitors. The round houses you see on site are built on the exact place that there were once real round houses all those years ago (based on the location of the post holes). It was a great experience to go inside a round house and see how the smoke from the fire didn't choke us and rose up into the roof space without setting fire to the thatch - a concept demonstrated by the costumed guide by making sparks fly up from the hearth! How does this work? Well, the answer is that there was no smoke hole at all as it would have added air and caused the sparks to ignite the thatch. (I tried to explain this when we built our own mini round house for her Easter project but this visit explained it much better!)

Our wonky attempt at a round house!

We learnt how to make fire using flint, about making bread and about weapons and warrior face paint too. The costumed guides did all they could to really make it come alive for the visitors.


If you'd like to know more you can here: www.castellhenllys.pembrokeshirecoast.org.uk   

Sunday 18 May 2014

Homemade Potions

Today I've been experimenting with potions! Not in the hubble-bubble toil and trouble way, but with this lavender and chamomile salve.

I've never tried making anything like this before but I'm quite pleased with how it's turned out so far.

This is how I made it:

I gently heated 1 cup of olive oil with 1/2 cup dried chamomile until warm then left it to infuse for 20 mins. Then I took the chamomile out and squeezed out the oil. I added 2 tbsp beeswax pellets and heated the bowl over hot water until the wax melted, then stirred in some lavender essential oil (12 drops) and some tea tree oil (6 drops). I poured it straight away into my cleaned pots and left it too cool.

I'm looking forward to using it and can't wait to experiment with more! I love the smell and the simplicity of the ingredients - no chemical nasties here :)

Tuesday 6 May 2014

A tale of Commission......


I often take commissions from clients to design and create a unique piece of jewellery for them, sometimes they know exactly what they want but other times they have an idea that I then need to bring to reality.

I had just such a customer recently - she was interested in the Evenstar pendant featured in the Lord of the Rings films. Now, I couldn't recreate this exact piece for her - that design belongs to the film studio and as such I would infringe their copyright if I were to do so. So we got talking about the piece as it featured in the film (and more importantly where it WASN'T featured in the book!) and she decided that she would rather have a completely new piece based on the book.


Now, where do you start on such a commission? Well, with the book of course ("oh dear, what a shame I guess I'll just have to read it again", I thought to myself with glee) so to the pages of my copy I turned.

If you know me at all, then you will know that I could talk for hours on the intricacies of the plot from Lord of the Rings, but I will not bore you with all the details now. Suffice to say we settled upon using this description of Arwen's pendant,

"a white gem like a star that lay upon her breast hanging upon a silver chain"    

This was a good place to start and left me with plenty of space to add my own ideas, so after lots of thinking and head scratching and crumpled up pieces of paper I settled on this idea:


The design features the impression of real leaves and an 8mm round moonstone cabochon at the centre. The customer loved the design and so I set about making it for her.You can see some of the stages of production along with the finished item in this picture:


I'm happy to say that my customer loved the finished piece - I enjoyed working on it so much that I was sorry to see it go really, it's given me lots of ideas for the future though!


Thursday 1 May 2014

The post is here!


Just recently I read a blog by a lady who had signed up for Postcrossing - I thought it sounded interesting so I had a look and signed up too.

Basically, you sign-up (for free) and get the addresses of other members around the world so you can send them a postcard. Each postcard has a unique ID which you write on it with your message and when the postcard arrives the recipient logs it online. Your address then gets given to another random member and you receive a postcard in return.

Already I have sent cards to Germany, USA, Russia and China and today I have just received my first card back (see the photo above).

I thought it would be a fun way of looking at Geography with the kids and there's something nice about getting post that isn't a bill isn't there!

If you'd like to find out more have a look at their website at www.postcrossing.com